
The headstock is shaped by tracing around the headstock template and then rough cutting outside the line on the bandsaw. Then the template is attached with screws, and the headstock is machined to its final shape on the router table with a template bit. The holes for the tuning machines are then laid out and marked. […]
Attaching the neck to the body
Temporarily attach the top to the body with masking tape. Then lay a straight edge on the top so that it rests on the top at the head block and runs to the point of the bridge’s location. Because of the arch in the braces, the straight edge will rise up above the tail block […]
Tapering the neck blank

Lay the neck blank top down on a tapered jib and plane the back with a Wagner Safe-T-Planer chucked in a drill press. This will taper the back of the neck to the correct dimensions. Smooth the transition from the headstock to the neck with a rasp and sandpaper.
Glueing the head plates
Glue the head plates to the front and back of the headstock. These add a decorative touch, and also significantly stiffen the headstock.
Adding the neck reinforcement
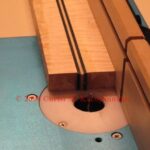
Lay the neck assembly top down on a router table, and route cavities for the carbon fiber neck reinforcement bars. Glue the carbon fiber neck reinforcement bars in place with epoxy, and clamp them down to make sure they are well seated in the cavities. Once the epoxy has dried, level the top of the neck assembly with […]
Applying the binding to the capping strip
After the capping stip is dry, sand the edges of the capping strip. On better quality bouzoukis, a decorative binding is glued onto the edge. It may be one binding strip of a contrasting color (to match the binding that will be used around the soundboard and along the fretboard) or a binding and purfling […]
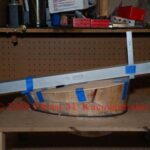
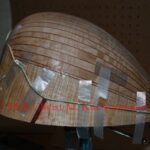
Scraping and sanding the inside of the body
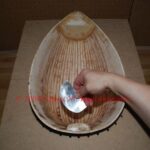
Before putting the body aside to work on other aspects of the bouzouki, it is a good idea to sand the inside. Apply several strips of strong tape to the outside to support the staves. Using a cabinet scraper that has been ground to a semicirclular profile, scape the inside of the body so that […]
Installing the kerfed lining in the body
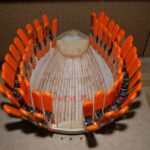
Once the inside of the body has been sanded smooth, the tailblock is carved so that there are no sharp corners, and then the kerfed lining is glued in place along the inside, top edge of the body. The kerfed lining is a triangular strip of wood with cuts made all along its length about […]
Glueing the stave reinforcement strips

After the glue on the kerfed linings has dried, the stave reinforcement strips are glued in place. On lutes, it is customary to glue a thin strip of linen or heavy paper along each seam between the ribs. On Greek bouzoukis, some makers will line the entire bowl (body) with strips of cloth soaked in glue […]
Glueing the soundboard halves

Prepare the soundboard halves by aligning the halves as they were when they were cut from the flitch. Plane the center glue edge on a shooting board and check the seam by holding the edge together in front of a light to make sure the seam is perfect. Make a glue board from a piece of plywood. Place the two […]